

This tutorial was written by myself. This tag is my own idea and creation.
Any similarity to any other tutorial or tag is co incidental.
Please read my tutorial basics (located top left sidebar) before you begin.
Supplies Needed
Ftu scrap kit is Steampunk by Graphics Of Fantasy Designs.
Tube. I have used Steampunk 6 by VeryManyTubes.com
Mask Wsl 417 from http://weescotslasscreations.blogspot.co.uk/
save to mask folder
Filters Used
Cybia - Screenworks - Dot Screen.
Open a new image 650x650.
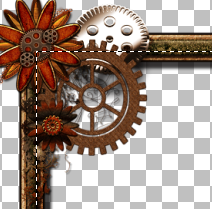
Copy/paste element 45 Frame resized to 70%.
Now because this frame has little fiddly add ons and is already drop shadowed we can't use the magic wand tool to float the inner to fill with our paper.
So instead use your rectangle selection tool and simply make a selection around the edge. See image below.
C/paste paper of choice from kit. I used paper 4 resized to 60%.
Move below frame in layer palette.
Selections - Invert - Delete. Select none.
Copy and paste your tube. To make it sit nice inside the frame duplicate it and move copy behind the frame layer.
Go back to your top copy and drop shadow. Now take your eraser tool and run it along the bottom of your tube to expose the frame then go the bottom copy and erase any tube showing below the frame.
Now continue to add desired elements from kit to your image.
Drop shadow as you go...I used
26 Masked Image. Position behind frame.
29 Clocks resized to 90%. Place behind Masked Image.
6 Pocketwatch/Rose Cluster resized to 50%. Position bottom left of Frame above Clocks below Masked Image layers.
32 Leaves resized to 35%. Mirror. Place behind Frame and Clocks top right of image.
19 Butterfly resized to 25 %. Position on the left above Frame / tube.
17 Hearts resized to 50%. Position on the right above tube layer. Duplicate.
Mask Layer. Copy/paste paper of choice. I used paper 5 resized to 85%. Move to the bottom of your layer palette below all other layers.
Go to layers - Load/save mask - Load mask from disk.
Fit to layer .
In layer palette delete mask and merge group.
Apply Cybia - Screenworks - Dot Screen. Transparency 0.
( please note if you resize your image when merged it will affect the look of this filter. I recommend that you just crop)
Merge all layers. Crop to your liking. I usually sharpen at this point rather than each separate element as I go along. Adjust - Sharpness - Unsharp Mask 5.0 - 30 -5.
Add name and relevant artist copyright and tube licence info.
Save as Png.
Thank you for stopping by and trying this tutorial. I hope you are pleased with your tag. Sal xoxo
Add name and relevant artist copyright and tube licence info.
Save as Png.
Thank you for stopping by and trying this tutorial. I hope you are pleased with your tag. Sal xoxo

No comments:
Post a Comment